
by Kate McCoy
As the demands of casting offices and production companies evolve, the requests for self-taping has increased. You might opt to have your audition professionally recorded, in which case a lot of the work is done for you. If, however, you choose to tape the audition yourself – either your schedule doesn’t allow you the time to go into a studio or you simply want to save money – there are a few tips you can follow to help your self-tape stand out in a good way.
1. Set Yourself Up Technically
Following basic guidelines regarding sound and lighting will go a long way. Make sure you are in a quiet space – no TVs, no loud neighbors, etc. When self-taping, the more lighting you have, the better. If you need to move lamps around, open the window blinds, or bring in extra lights from other rooms, do so. Ideally, the light source should not be in your shot. Avoid sitting in front of a lamp or window so that you are not back-lit. Your background should be plain and in a neutral color (grey or light blue work well). If you are recording on a phone, make sure it is turned horizontal before hitting record.  If you do a lot of self-tapes at home, it’s worth investing in a tripod for your phone so that your self-tape is not shaky and therefore difficult to watch. You should have a reader off-camera. Your reader should not have to balance the phone and the sides, which is another reason why you need a tripod or some other device to steady your recording device. If you can get a microphone for your recording device that can be attached to you or placed near you, that’s helpful. Otherwise, you likely won’t be as loud on the tape as your reader, and the casting office wants to hear YOU. If you are not using a microphone, it’s not the end of the world. Just make sure you are speaking at a volume that can be heard and understood when playing the audition back. You can also experiment with moving the recording device closer to you, while your reader stays further back so that your voice is the one that comes through most prominently.
2. Prepare Your Performance
The great thing about self-taping is that you can do as many takes as you’d like. The downside is that you are not in the casting-room to get feedback from the director, so it can sometimes be hard to know if you are in the ballpark of what they are looking for. Don’t worry about what is out of your control. Focus on what you CAN control – your preparation. In my opinion, you should always be off book. 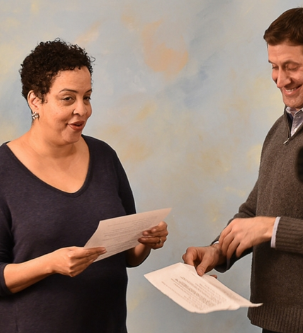 Some agents and casting directors prefer that you keep the sides in your hands at all times during the audition, other agents and casting directors will prefer the exact opposite. Just know that it is a personal preference, and there is no “golden rule.” Regardless of whether you hold the sides or not, being off book will make you feel more confident and give you the freedom to be more present in the scene. If holding the sides makes you more comfortable, it is likely that you can frame your shot where the sides are not even seen. And since you have the opportunity to do multiple takes, try a few with the sides (if necessary) and then try a few without. You might discover you don’t need to hold them after all.
When it comes to recording your audition, keep things simple. The most important thing when self-taping is that your face and eyes be visible and that you be present in the scene. In other words, don’t incorporate a lot of props and set pieces into your audition. A good rule of thumb: if it’s too big to fit in your pocket, it’s probably too big to use for your audition tape. Every now and then a scene will involve a phone call, where your character is talking to someone on the other line. In cases like these, I do think it’s a good idea to use a phone. Sure, there are exceptions, but in those special cases, your agent or the casting office will likely give you specific instructions.
Take your time. Often when we record ourselves speaking, we play it back and think, “Wow, I had no idea I was talking that fast.” When self-taping watch your takes so that you can see and hear what you are doing on camera. You might find you tend to sway from side to side or rush your words, or maybe you blink a lot to the point of distraction. You won’t know unless you watch yourself, and then you can begin to work on those idiosyncrasies.
3. Send a Professional Link
You’ll receive various instructions on how to submit your audition. Whether it’s to send a downloadable link, upload to EcoCast or post on Vimeo, always be sure to follow the instructions exactly. Attaching the video directly into an email is usually not desired, as it takes up space in the recipient’s email account.  If you are not given specific instructions on how to submit the self-tape, a downloadable link is the standard way to go. WeTransfer makes this process fast and easy, and it’s FREE.
Self-tapes are becoming a standard means of auditioning. Don’t worry if you’re not a pro just yet – you’re not alone. The more you do them, the easier it will become. Self-taping truly does open up a world of possibilities, allowing you to explore different ways of doing a scene that you wouldn’t normally get if you were in the casting-room. Take advantage of it. And if it all feels just a bit overwhelming, hire a professional to tape it for you.
If you plan to have your audition professionally recorded, check out the next blog post: “3 Things To Remember When Getting a Professional Self-Tape.”
 Kate McCoy is based in Chicago where she provides coaching and audition taping services to actors. As a session runner at Paskal Rudnicke Casting, she directed auditions for Payless, Cheetos, Bud Light and many others. She has assisted with casting at The Onion and served as the lead casting director for projects with Les Mills International and TV House Films. You can also find her teaching workshops at The Second City Training Center. Additionally, her credits include shooting and editing Matt Miller’s Virtual Showcase, creating a behind-the-scenes video series for TimeLine Theatre’s Chicago premiere of Spill, and, on the lighter side, shooting and editing videos for iO Chicago’s live reality show Bit Tank. Need a self-tape? Kate can help!